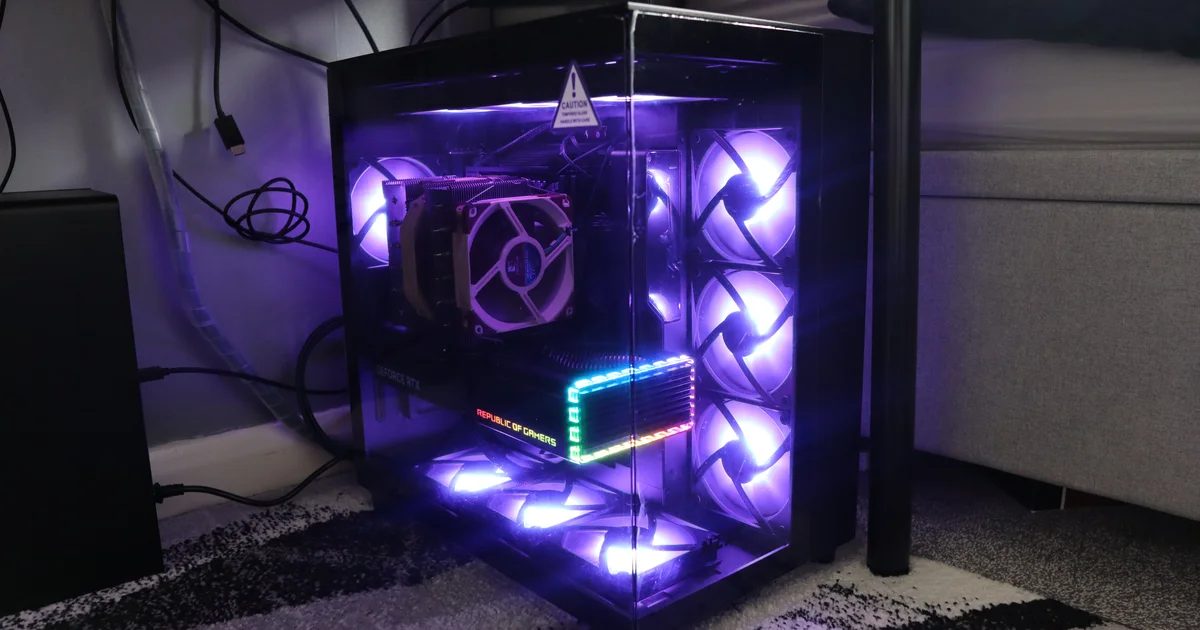
I’m dealing with a bit of an unusual circumstance when it comes to building a gaming PC. After writing about computer parts for a number of years, I’d like to think I’ve built up a solid grasp of which components are the best fit for gaming. Still, for all my eagerness over the years, I’ve never actually put a PC together myself. After several years using an older HP Envy system loaded with aging hardware, I decided it was finally time to upgrade—and I wanted a flexible gaming setup that could last as long as my previous machine.
A blend of excitement and inexperience pushed me a little too far, and it quickly became clear that this was both educational and stressful. Making a high-end rig as your first attempt isn’t easy, particularly when you’re constantly weighing costs and realizing that even small errors can end up being very expensive.
That said, I feel like I picked up a lot along the way, as the ideas I’d read about were tested against real-world building. I hope my experience is useful for you—if nothing else, I’m hoping it’s at least interesting. Keep scrolling to read the full article from beginning to end, or use the links below to jump straight to the build, the benchmark results, and the final takeaways.

One of the first things I learned as I jumped into building my first PC was that the PCPartPicker site is an incredibly valuable tool for choosing parts. Its component library includes a wide range of options, up-to-date pricing, and a straightforward system that flags incompatible selections as you go—so, for example, you wouldn’t bother with Intel motherboards once you’ve chosen AMD, and you’d skip 360mm liquid coolers if your case only supports 240mm.
It also includes a strong set of filters, which is handy when you want to sort components by specific details—like RAM timings, transfer rates, or even the performance characteristics of an SSD. That makes it much easier to zero in on the exact parts you’re after. And if you’re working with a compact build, you can sort GPUs by their overall length to make sure everything will physically fit.
Of course, it’s not perfect. Some real-world fit constraints can’t be fully captured by PCPartPicker, including clearance between the CPU cooler and RAM—an issue I ran into during my selection process, though I’ll get into the details a bit later. Even so, it’s an outstanding option for choosing components and planning a budget, since it helps you monitor spending and compare what you’ve used against what’s left within your set price limit.
| Category | Component | Justification |
|---|---|---|
| GPU | Asus ROG Strix Gaming OC GeForce RTX 4080 16 GB | The 4080 is a high-performing graphics card that handles 4K gaming with strong frame rates, and this Strix model adds a set of eye-catching RGB lights while also being a notably large, weighty card. |
| CPU | AMD Ryzen 7 7800X3D | It’s, quite honestly, the best value gaming CPU you can buy right now. |
| RAM | 32GB Corsair Vengeance DDR5-6000 CL36 | DDR5-6000 memory running at 6000MT/s delivers a meaningful performance boost on AM5, and this Corsair kit is priced sensibly. |
| Storage | Lexar NM790 4TB NVMe SSD | A great-value gaming SSD, offering solid speeds along with plenty of storage capacity. |
| Case | NZXT H9 Flow (Black) | I wanted to try a dual-chamber case, and the H9 Flow stands out visually while still including practical features. |
| Motherboard | NZXT N7 B650E (Black) | A nicely specified AM5 motherboard that fits the case’s clean, stylish look. |
| Cooler | Noctua NH-D15 (modified) | I wanted to include Noctua in this build, and the NH-D15 is highly recommended—though it did require a small adjustment to make it fit. |
| Fans | NZXT F120 RGB Core (Black) | They coordinate with the rest of the parts, and I wanted a touch of RGB for visual flair. |
| PSU | NZXT C1200 Gold 1200W 80+ Gold | With 1200W, there’s plenty of power for the components in this system, plus headroom for future upgrades. |
Overall, I aimed for the £2200–£2500 range, and that’s roughly where my budget landed. I built the parts list using a mix of suggested reviews, my own preferences, and extra guidance along the way—especially a selection of Digital Foundry reviews I trusted.
The most obvious part of this setup is, of course, the graphics card. It’s right in the open—this is a £1500 4080, while an MSRP 4090 costs only about ten percent more. Asus also kindly provided this specific 4080 configuration to me for a few weeks while I assembled and tested the PC. It’s a stunning card with plenty of power, but I couldn’t see myself spending that much on a 4080. In the final build, I’m planning to use an Nvidia RTX 4080 Super Founder’s Edition instead, because it’s an MSRP model—so the total cost comes back down to my target figure. I just haven’t run benchmarks on that final GPU yet.
That’s the breakdown of the components I selected, along with the key benefits PCPartPicker offers you. Now, let me walk through the challenges I faced while putting this system together.